We'll need to borrow the Player class from the earlier lessons with a few very simple modifications. The modifications are nothing new, so I'm going to give you the updated Player class with several methods added to let us get individual fields out of Player objects. For example, I've added a getName() method to get the player's name, getPosition() to get the player's position, and other methods to get the values of each data field in the class. Remember to put this class file into the same directory or project that we'll use for our Lists class.
We'll also need a file of player information that we can use to populate our list. You can create your own if you like, but to make it easier I've included a text file you can copy and use below.
The last thing I'll give you to set up for this lesson is a program that will build the menus and open the window for us, since doing that is also review. That program is available at the link below, although if you're feeling ambitious, you can probably build it in about 15 minutes from earlier programs we've done.
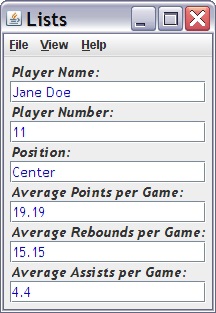
The above program will display the following window as a starting point for our application:
\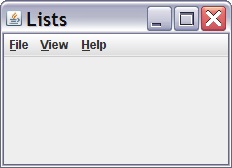
Starting Lists Window
Except for the Exit and About Lists menu items, none of the menu items functions yet. We will add their functions as we build the screen and the logic to produce our display.
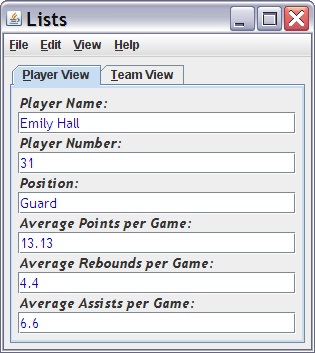
We'll start with the layout of the Player View. It's a simple vertical sequence of alternating labels and text fields. We're going to need to be able to refer to them individually, though, when we update text values and when we switch views. The easiest way to do that is to make them instance variables so we can refer to them anywhere in our program. Let's add these labels and text fields at the top of our Lists class:
Now we're ready to flesh out our makeContent() method, which was completely empty in the code I gave you earlier in the chapter. Before we add components to it, though, we need to decide what layout manager to use. Since we have a simple vertical alignment, the BoxLayout manager with its vertical axis option (Y_AXIS) is the easiest and best choice. Let's add a line to set up that layout as the first line in makeContent():
One more thing before we start adding components: Remember how, in our pizza screen, the edges of the screen were right up against the components we added to it until we added a border to provide a little separation? We don't need a border with a line or a title this time, but let's add an empty border to our content pane, like we did to the pizza screen. After we get the design built and working, you can try your window without the border to see what it looks like if you want. You might even like it better that way! But for now, let's build it with the border so we have a little space around the edges. The border statement is the second line we'll add to makeContent():
Now we're finally ready to start adding our components. Let's add the first one together, then I'll let you add the other five on your own since they're very similar. The first thing to note about the labels and text fields in the example is that we don't want to use the standard font for them. We want bold, italicized text for the labels, and we want blue text for the fields. We also want the text to be slightly larger than the default font size. The example above uses a 14-point font rather than the default (usually 10 or 12 points). We can set up the first label and text field with the correct properties as follows:
TQA-29 --- The first line creates a new JLabel object with the text for the first label, then assigns it to the nameLabel instance variable we created earlier. The second line shows us something new. It uses the JLabel object's setFont() method to change the default font settings for the label. That method, as you might expect, requires a Font object as its argument. The most common way to get a Font object is to simply create a new Font with the properties we want whenever we need one. And that's what we did here, although we could have named the Font object anything we wanted and used the name here just as well.
Creating a Font this way requires three arguments. The first is a font name. In this case, I just chose my personal favorite, but you can use any font you prefer. The second argument is a font style. The Font class itself includes three style options we can use here: Font.PLAIN, Font.BOLD, and Font.ITALIC. Their names are self-explanatory. To use both bold and italics at the same time, we just add them, as in the code above. The third argument is the size (in points) we want for our font. In this case, we used size 14.
The third line of code above adds the label to our content pane.
The next two lines create and set the font for our first text field in much the same way we just did for the label. The line after them, though, sets the foreground color for the text box, which is the color the text gets drawn in. We could also set the background fill color for the text box by using the JTextField method setBackground(). I'll let you experiment with that option if you'd like to.
The last line adds the text field to the content pane so we can see it in the window. If you've added this code to your makeContent() method, your program should create this window when it runs:
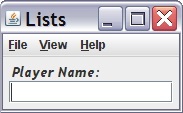
Window with the first field
Go ahead and add the rest of the fields to the pane. When you're done, your program should generate a window that looks just like the first one in the lesson, except without any data in the fields. If you have trouble making it work, you can look at my makeContent() method here:
Now that we've laid out the window, let's fill it in with some data. When we open a file, we want our program to read all the players into a list and then get the data for the first player in the list and display it in the Player View window. We'll want to save our position in the list, too, so we can move forward and backward to display other players in the window.
We'll do all that when we use the Open menu option to choose and open our input file, which means we'll use the inner listener class OpenMenuItemListener. Right now, all that class does is display a dialog box to acknowledge that the menu item was selected. Let's start by replacing that dialog display with the following code:
This code introduces a new class that's very useful to us. The JFileChooser is Java's version of the File Open and File Save As dialogs in Windows, Mac OS X, and Linux. We'll use its Open dialog, which opens a window into the user's default directory, showing all the files and subdirectories it contains. The user can move around in the directory structure before selecting a file, and once he or she selects one, the JFileChooser object stores its file information so we can use it after the dialog closes.
The first line of the code above creates a new JFileChooser object named fc.
The next line calls its showOpenDialog() method to display the Open dialog box and allow the user to select the file to open. The argument to the method is the window that serves as the "parent" window to the dialog and to which control will return once the Open dialog closes. The dialog this call opens should look familiar:
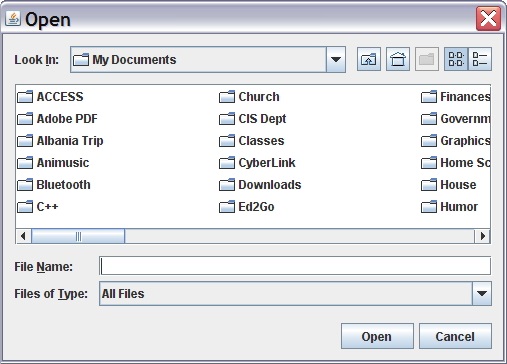
Java File Open dialog
The third line of code above takes the information gathered by the file chooser dialog and creates a File object with it. If the user didn't select a file but instead closed the window using the Cancel button, this file object will be null. That's why we included the next two lines, an if statement that ends the actionPerformed() method and leaves our Lists window unchanged if the user doesn't select a file. Without this if statement to end the method, trying to read data from the file would cause our program to crash if the user didn't select a file.
Assuming the user selects a valid text file with player information in a valid format, like the one I provided above, we won't use the if statement we just discussed, and we'll be ready to read the data from the file into our list. We did that once already back in Lesson 3, so I will just show you the code here, updated to reflect the results of using of the File Open dialog. We need to add code in three places. The first line we'll add is an import statement at the top of the file with the other import statements. We need to import java.io.*, since we will be using both the java.io.File and java.io.IOException classes.
The next line we'll add will create our list variable as an instance variable in our program so we can use it in several of our methods. This line goes at the top of the class with the other instance variables:
Finally, we need to add the code below to the actionPerformed() method in OpenMenuItemListener:
There is one other difference between this code and what we used in Lesson 3. This code displays an error dialog box if there is an I/O Error with the file instead of just sending an error message to the console. Then it closes the program.
But if the user selects a valid file, the code above creates an empty list, uses a Scanner object to open and read the file, loads each player's information into a Player object, and adds the Player object(s) to our list. When the program reaches the end of the file, it closes the Scanner object (and the file), and we have our Player objects in a list.
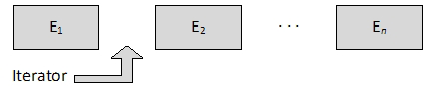
The next thing we need to do is load the first player's information from the list into the fields of the screen so we can see it. Then we'll save our position in the list so we can move forward and backward using the Next and Previous menu options. In order to do both of those, we're going to use a helper class that works with almost all Java collections—the Iterator class. Each Java collection that uses iterators can create an Iterator object that we can use to move through the collection.
The iterator provides us access to every element of the collection without duplicating any of them.
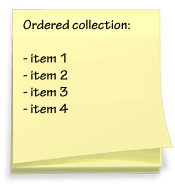 In a computer system, we define a list as an ordered collection. When we use the term ordered here, we mean that each item has a position in the list, with one item in front of it (unless it's the first item) and one item behind it (unless it's the last item). In Java, we can retrieve a list's items from first to last, from last to first, or from a particular position in the list.
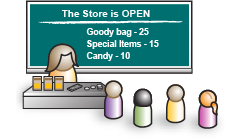
 Stacks also differ from basic lists in one way: Instead of FIFO, stacks process items in LIFO order. As you might have guessed, that means last-in, first-out. To visualize a stack, think of a stack of plates. We normally add to the stack by putting plates on top, then take plates off the top when we need them. Computer systems use stacks to manage their resources, especially memory. You may not have realized it, but every time you call a method in a Java program, the computer uses a stack to manage your program's resources.
 And it's another structure that we use frequently—whenever we look up a telephone number, in fact. A map is a structure that contains two values for each entry: its key and its value. In a phone book (or in your cell phone), the key is the name of the person you want to call. The value is the phone number you get when you look up the name. Again, computer systems use maps often to store and retrieve information quickly when you have a key. It's much faster to find an entry when you can go straight to it rather than have to look through an entire list.